
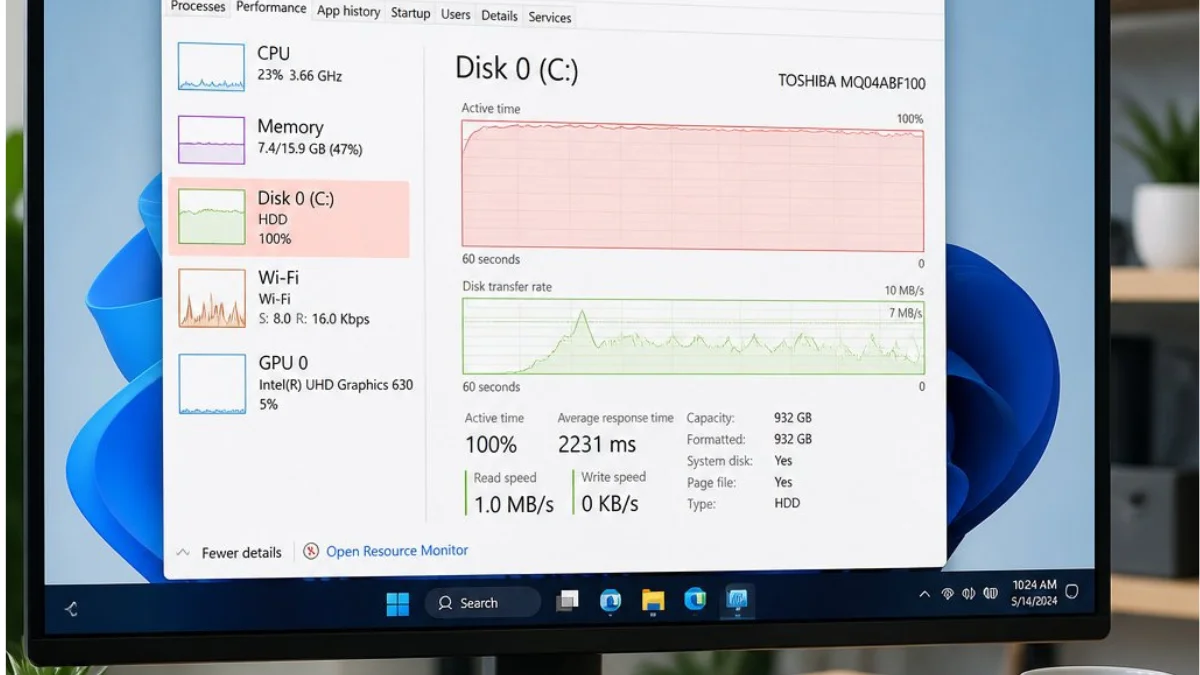
Is your Windows 11 Task Manager showing 100% disk usage — even when you’re not doing anything?
Does your PC feel:
- Extremely slow
- Frozen or unresponsive
- Delayed when opening apps
- Stuttering during gaming
- Slow to boot
If so, high disk usage is likely the cause.
The good news?
You can fix 100% disk usage in Windows 11 safely — without reinstalling Windows.
This guide shows you exactly how.
What Does 100% Disk Usage Mean?
When your disk is at 100% usage, it means your storage drive (HDD or SSD) is fully occupied handling read/write operations.
Even if your CPU and RAM usage are low, disk bottlenecks can make your entire system feel slow.
This problem is especially common on:
- Older HDD-based laptops
- Budget SSD systems
- 4GB or 8GB RAM computers
- PCs after Windows updates
Step 1: Check What’s Causing High Disk Usage
Before fixing it, identify the cause.
How to Check Disk Usage:
- Press Ctrl + Shift + Esc
- Open Task Manager
- Click the Processes tab
- Click the Disk column to sort by usage
Look for:
- SysMain
- Windows Search
- Antimalware Service Executable
- Update processes
- Third-party apps
If your system is generally slow, start here:
👉 How to Speed Up Windows 11
Step 2: Disable SysMain (Superfetch)
SysMain is one of the most common causes of 100% disk usage.
It preloads apps into memory — but on low-end PCs, it can overload your drive.
Disable SysMain:
- Press Windows + R
- Type
services.msc - Find SysMain
- Right-click → Stop
- Set Startup Type to Disabled
Restart your PC and check disk usage again.
This fix alone resolves the issue for many users.


Step 3: Disable Windows Search Indexing
Search indexing constantly scans your drive.
On slower drives, this causes high disk activity.
Disable Windows Search:
- Press Windows + R
- Type
services.msc - Find Windows Search
- Right-click → Stop
- Set Startup Type to Disabled
If you rely heavily on file search, you can leave it enabled — but many low-end PCs benefit from disabling it.
Step 4: Disable Startup Apps
Too many startup programs increase disk activity immediately after boot.
Disable Startup Apps:
- Open Task Manager
- Go to Startup
- Disable unnecessary programs
Full tutorial here:
👉 Disable Startup Apps in Windows 11
Reducing startup load lowers disk strain.
Step 5: Remove Background Apps
Apps running in the background can constantly access the disk.
Disable them:
Settings → Apps → Installed Apps → Advanced Options → Background Permissions → Never
Detailed guide:
👉 Remove Background Apps in Windows 11
This reduces disk and RAM pressure.
Step 6: Check for Windows Updates
Sometimes high disk usage is caused by incomplete or pending updates.
Go to:
Settings → Windows Update → Check for Updates
Install updates and restart your PC.
If disk usage started after an update, check:
👉 Windows 11 Slow After Update Fix (create this supporting page later)
Step 7: Run Check Disk (Scan for Errors)
Corrupted sectors can cause disk overload.
Run CHKDSK:
- Search for Command Prompt
- Right-click → Run as Administrator
- Type:
textchkdsk /f /r
- Press Enter
- Restart when prompted
This scans and repairs disk errors.
Step 8: Upgrade from HDD to SSD (If Applicable)
If you’re using an HDD, 100% disk usage is much more common.
Switching to an SSD dramatically improves performance.
However, even SSD users can experience high disk usage due to background services.
Step 9: Reduce RAM Pressure (Important)
Low RAM forces Windows to use the disk as virtual memory (paging file).
If you have 4GB RAM, this is very common.
Optimize RAM usage:
👉 Best Windows 11 Settings for 4GB RAM
👉 Reduce RAM Usage in Windows 11
Lower RAM usage = lower disk swapping.
Step 10: Adjust Power Settings
Power Saver mode can cause disk throttling.
Switch to High Performance:
Control Panel → Power Options → High Performance
Full guide:
👉 Optimize Power Settings in Windows 11
Step 11: Check Antivirus Activity
Windows Defender scans can temporarily spike disk usage.
To check:
- Open Task Manager
- Look for Antimalware Service Executable
If it spikes constantly, allow the scan to finish.
Do NOT disable Defender permanently.
00% Disk Usage After Windows 11 Update?
If disk usage started after a major update:
- Disable SysMain
- Disable Windows Search
- Restart multiple times
- Let updates fully finish installing
Updates can temporarily spike disk usage.
Manual Fix vs 1‑Click Optimization
You can manually follow all 11 steps above.
But manual troubleshooting:
- Takes 30–60 minutes
- Requires navigating multiple system areas
- Is easy to miss something
The Win11Fly 1‑Click Script automatically:
✅ Disables unnecessary services
✅ Optimizes startup
✅ Reduces background activity
✅ Adjusts performance settings
✅ Applies safe disk-related tweaks
All in under 60 seconds.
👉 Fix My Slow Windows 11 PC Now
Frequently Asked Questions
Why is my disk at 100% but nothing is running?
Background services like SysMain or Windows Search are often the cause.
Is 100% disk usage dangerous?
It won’t damage your drive immediately, but it severely impacts performance.
Does SSD get 100% disk usage?
Yes — though it’s less common than HDDs.
Will upgrading RAM fix it?
Often yes — especially on 4GB systems.
✅ Final Thoughts
100% disk usage in Windows 11 is one of the most common causes of slow performance.
By:
- Disabling SysMain
- Turning off search indexing
- Reducing startup apps
- Removing background processes
- Optimizing RAM usage
- Updating Windows
You can dramatically improve responsiveness.
If you prefer a faster, automated solution, the 1‑Click Script applies the most effective fixes safely.
You don’t need to reinstall Windows.
You just need proper optimization.
⚡ AUTOMATE THIS ENTIRE BLUEPRINT IN 10 SECONDS
Our safe, lightweight optimization utility condenses this entire
guide into a single script.
It triggers an automated safety restore
point, strips structural telemetry, purges system bloatware, and
optimizes memory allocation with zero manual effort required.
💰 Secure Lifetime Access for Only $5